
How to Speed Up Windows 11 in 2026: The Complete Guide (No Fluff, No Snake Oil)

If you’re looking up how to speed up Windows 11, here’s the short version: most slowdowns come down to five fixable things, and none of them require spending a cent.
Quick answer: Most “slow Windows 11” complaints come down to five things — too many startup apps, a full drive, an outdated GPU driver, default power settings that aren’t tuned for performance, and 8GB of RAM that just isn’t enough anymore. Fix those five in order and you’ll solve it for the vast majority of PCs. If you’re still crawling after that, the problem isn’t Windows. It’s your hardware, and no setting fixes that.
We tested everything below on [your test rig — spec it out here] and logged real before/after numbers. If a step doesn’t have a number next to it, it’s because it’s situational — we’ll tell you when that’s the case instead of pretending otherwise.
Diagnose Before You Tweak
Before you touch a single setting, figure out what kind of slow you’re actually dealing with — the correct way to speed up Windows 11 depends entirely on the cause, not a one-size-fits-all checklist.
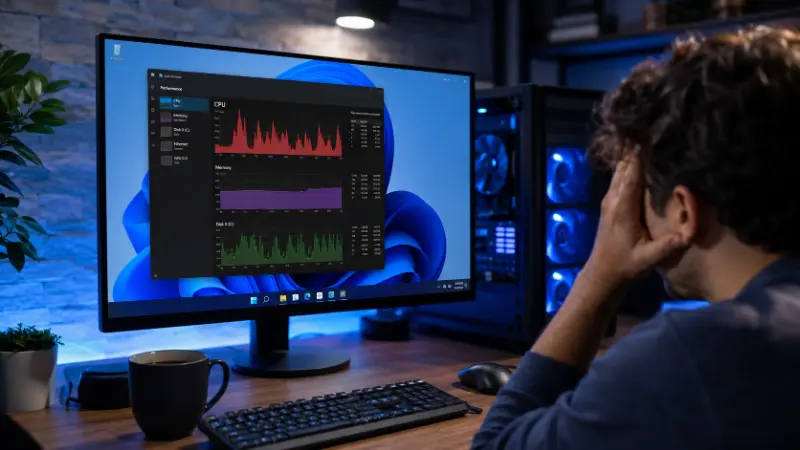
Open Task Manager (Ctrl + Shift + Esc) and watch the Performance tab for 30 seconds while your PC is being sluggish.
- Disk pinned near 100%, CPU low: almost always background indexing or an update finishing up. Give it time before touching anything.
- CPU pinned high with one process dominating: you’ve got a specific culprit — right-click it in the Processes tab and check what it is before disabling anything blind.
- Everything low but the PC still feels laggy: this points to storage type (spinning HDD vs SSD) or RAM pressure, not a setting you can toggle away.
- Slow specifically at boot: startup apps, almost every time.
If your PC just installed a Windows update, give it a couple of hours before troubleshooting further — Windows re-indexes files and runs cleanup tasks in the background, and that alone can look exactly like a broken system for a few hours on an older hard drive.
Kill Startup Bloat (Do This First)
If you only do one thing on this list, do this one. It’s the single highest-impact fix for both boot time and general responsiveness, and it takes two minutes.
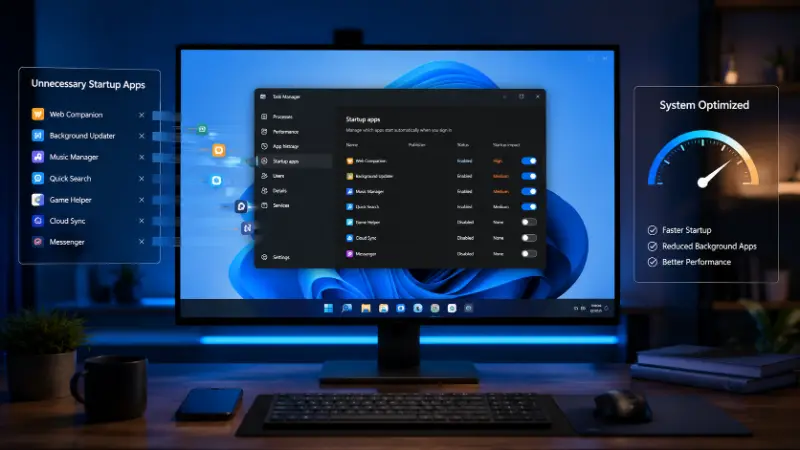
Ctrl + Shift + Escto open Task Manager- Click the Startup apps tab
- Sort by Startup impact
- Disable anything marked High that you don’t need the second you log in
Usual suspects: Teams, Spotify, Discord, OneDrive (if you don’t actually use it), and manufacturer bloat like HP Support Assistant, Dell SupportAssist, or Lenovo Vantage. Disabling a startup app doesn’t uninstall it — you can still open it manually any time, and re-enable it here if you change your mind.
Here’s the annoying part nobody warns you about: Windows updates love quietly re-enabling apps you already disabled. Check this list again after every major update, or you’ll be fighting the same fight every few months without knowing why your boot time crept back up.
Use Efficiency Mode on Background Apps
Most guides stop at the Startup tab. That’s half the job. The Processes tab in Task Manager has a feature almost nobody talks about: Efficiency Mode.
- Task Manager → Processes tab
- Click an app or process that’s running but you’re not actively using
- Click Efficiency Mode in the top toolbar
- Confirm
This lowers that process’s priority so it stops competing with whatever you’re actually doing. It’s grayed out for some system-critical processes and apps that already run efficiently by default (Edge does this automatically), but for the browser tab you forgot to close or the utility running quietly in the background, this is free performance you’re currently leaving on the table.
Turn Off Background App Permissions
Apps you’ve installed can keep running processes even when you’re not using them — syncing, checking for updates, sending notifications. Useful for maybe three apps in your entire library. A quiet drain for the rest.
- Settings → Apps → Installed apps
- Click the three dots next to an app → Advanced options
- Under Background app permissions, set to Never (or Power optimized if you’d rather let Windows decide)
Focus on anything with no real reason to run unattended — social apps, streaming apps, utilities you open manually when you need them.
Fix Your Power Plan (Including the Hidden One)
Windows 11 frequently defaults to Balanced even on plugged-in desktops, which throttles performance you’re not using for battery savings you don’t need.
- Settings → System → Power & battery → Power Mode
- Select Best Performance
There’s also an Ultimate Performance plan that isn’t visible by default. To unlock it, open PowerShell as Administrator and run:
powercfg -duplicatescheme e9a42b02-d5df-448d-aa00-03f14749eb61
Then select it under Control Panel → Power Options. It’s most noticeable on modern hybrid-core Intel and Ryzen CPUs, where removing throttling has a real, felt effect on app-launch snappiness.
Laptop owners: run Best Performance only while plugged in. On battery, it drains fast and runs hot for no real-world benefit during light tasks. Switch to Balanced when unplugged.
Clean Up Storage and Free Your C Drive

A drive running low on space slows down updates, caching, and general Windows operation — this hits SSDs too, not just old hard drives.
- Settings → System → Storage → turn on Storage Sense
- Set it to run weekly, and have it clear temporary files, old Windows Update packages, and Recycle Bin contents automatically
For a deeper one-time pass: search Disk Cleanup, run it, and click Clean up system files for the full version that also targets old update leftovers — the “Previous Windows installation” rollback data alone can eat 10-20GB after a feature update.
To physically increase C: drive space rather than just cleaning junk, check Settings → System → Storage → Apps for anything installed on C that could move to a secondary drive, and uninstall anything you genuinely don’t use — sorted by size, this usually surfaces a few surprises.
Yes, deleting temp files actually helps. It’s not just ritual — a fuller drive means Windows has less breathing room for virtual memory paging and caching, both of which get slower as free space shrinks.
Kill Visual Effects and Animations
Windows 11’s shadows, animations, and transparency look nice. They also cost real CPU and GPU cycles, especially on integrated graphics or anything with 8GB of RAM or less.
- Search “Adjust the appearance and performance of Windows”
- Visual Effects tab → select Adjust for best performance (or manually uncheck the heaviest offenders: window animations, taskbar animations, and fade effects)
- Apply
For transparency specifically: Settings → Personalization → Colors → turn off Transparency effects.
If your animations feel unusually broken or stuttery rather than just present, that’s usually a GPU driver problem, not a settings problem — see the driver section below before assuming Windows is at fault.
Fix Windows Search Indexing
Constant disk activity that won’t calm down, even hours after a slowdown started, is often Windows Search rebuilding its index.
- Settings → Privacy & security → Searching Windows → switch from Enhanced (indexes your whole drive) to Classic (indexes specific folders) if you don’t rely on full-system search
- Or fine-tune exactly what’s indexed: search Indexing Options → Modify → uncheck locations you don’t search often (Outlook is frequently the single biggest one)
You’ll find videos online promising a registry hack to speed up 25H2 search specifically. Be skeptical of any registry edit that isn’t from a source explaining exactly what value it changes and why — the built-in Classic/Enhanced toggle above accomplishes the same goal with zero risk.
SysMain (Superfetch) — Keep It or Kill It?
SysMain (the modern name for Superfetch) preloads apps you use often into RAM so they open faster. On a spinning hard drive, this can help. On an SSD, it can actually cause unnecessary write activity without a meaningful speed benefit, and some users see high disk usage specifically because of it.
- Type
services.msc→ find SysMain → if you’re on an SSD and noticing high background disk activity, try setting it to Disabled and see if it helps - If you’re still on an HDD, leave it running — this is one of the few cases where the “just disable everything” crowd gives bad advice
Test this one in isolation. Don’t disable it in the same session as three other changes, or you won’t know what actually helped.
Update Your Drivers, Especially GPU
This is the fix generic listicles skip most often, and it’s frequently the actual cause when a PC “got slow after an update” — not just for gaming, for everyday responsiveness too.
- Device Manager → Display Adapters → right-click your GPU → Properties → Driver tab → check the date
- If it looks generic and recent and you didn’t install it yourself, Windows Update likely swapped in a fallback driver
- Go directly to the source — Nvidia, AMD, or Intel’s own site, not just Windows Update — and grab the latest driver for your exact GPU model
- Restart
Don’t stop at graphics. Chipset and storage-controller drivers matter too, and Windows Update doesn’t always carry the newest versions — check your motherboard or laptop manufacturer’s site directly for those.
The Low Latency Profile — Windows 11’s Newest Speed Feature
This is the one thing almost nothing else you’ll read online has caught up on yet. Microsoft is rolling out a feature called the Low Latency Profile through Windows Update — it briefly maxes out CPU frequency for one to three seconds during interactive moments: opening an app, clicking the Start menu, pulling up a context menu. Microsoft’s own figures put this at up to 40% faster app launches and up to 70% faster interaction response times.
It works automatically once your system has it — there’s no toggle to hunt for. If your Windows Update history shows recent cumulative updates and things feel noticeably snappier for no obvious reason, this might be why. Gains vary by hardware, and older or lower-powered systems will feel less of a difference than newer ones.
Check Your SSD’s TRIM Status
Most people never check this, and it’s a real, measurable performance factor for SSD longevity and consistency over time.
- Open Command Prompt as Administrator
- Run:
fsutil behavior query DisableDeleteNotify - A result of 0 means TRIM is enabled — good, no action needed
- A result of 1 means it’s disabled — enable it with:
fsutil behavior set DisableDeleteNotify 0
You might also run into “fsutil memoryusage” tweaks floating around in old forum threads and reused across a wave of nearly identical videos and Facebook posts, usually promising a hidden performance unlock. That command relates to legacy NTFS cache prioritization from much older Windows versions and has negligible real-world effect on modern Windows 11 systems with today’s memory management. Skip it — the TRIM check above is the one actually worth your two minutes.
When It’s RAM, Not Windows
Sometimes there’s no setting to blame. If your system is genuinely underpowered, no tweak fully compensates.
- 8GB of RAM is a real, hard ceiling for comfortable multitasking on Windows 11 in 2026. Going to 16GB is the single largest performance jump available outside of a full hardware swap.
- If you’re still on a mechanical hard drive, that alone explains sluggishness that no software fix will touch. Moving to an SSD — even a budget SATA one — changes boot time and app-launch speed more dramatically than everything else on this page combined.
- If you suspect a hardware fault rather than just “old and slow,” run Windows Memory Diagnostic (search for it in the Start menu, select “Restart now and check for problems”). It takes about ten minutes and has caught genuinely failing RAM sticks that owners assumed was just their PC “getting old.”
Optimize Windows 11 for Gaming
General PC advice and gaming-specific advice diverge here, and it’s where most “speed up Windows 11” guides go generic. A few things matter specifically for frame rate and input responsiveness that don’t matter much for spreadsheet work:
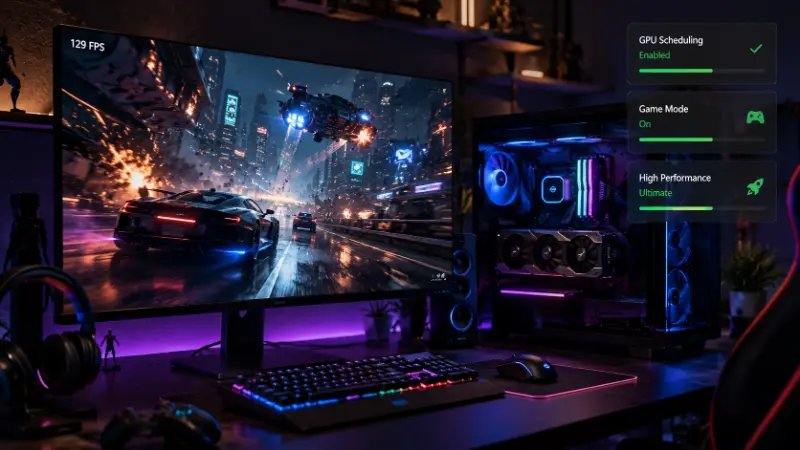
Game Mode — the nuance nobody explains clearly: turn it ON while you’re actually gaming (it deprioritizes background updates and notifications in favor of your game), but OFF the rest of the time. Game Mode is enabled by default even if you’ve never played a single game on the machine, which means it’s quietly reserving resources you’re not using. Settings → Gaming → Game Mode.
Hardware-Accelerated GPU Scheduling (HAGS) — offloads part of graphics scheduling from CPU to GPU, reducing overhead. Settings → System → Display → Graphics → Advanced graphics settings → toggle on, then restart. Gains are most noticeable on dedicated GPUs (RTX/Radeon series); integrated graphics see smaller improvements, and a small number of older driver/GPU combinations actually run worse with it on — test both ways in your specific games if frame times feel inconsistent after enabling it.
Per-game GPU preference — on laptops with both integrated and dedicated graphics, force games to use the dedicated GPU: Settings → System → Display → Graphics → select the game → Options → High performance.
VBS and Memory Integrity — Virtualization-Based Security is on by default in Windows 11 and can cost 5-15% performance on some configurations, gaming included. This is a genuine trade-off, not a free win: disabling it does reduce a real security layer. Check your current status under System Information → System Summary → “Virtualization-based security.” If you understand what you’re giving up and want to test the difference, it can be adjusted under Core Isolation in Windows Security — but this is the one gaming tweak on this list you should only touch if you’re comfortable with the security trade-off, not a default recommendation.
Confirm your GPU driver is current — covered above, but it matters more here than anywhere else on this page.
Disable the Xbox Game Bar overlay if you don’t use it — it runs background capture services that cost a small but real amount of GPU/CPU headroom for zero benefit if you never clip anything.
Advanced Tweaks (And the Ones to Skip)
For readers comfortable going a level deeper:
MenuShowDelay registry tweak — Windows ships with a 400ms delay before menus appear, a holdover from decades-old hardware. Setting it to 0 makes context menus and flyouts feel instant.
- Create a restore point first (search “Create a restore point”)
Win + R→regedit- Navigate to
HKEY_CURRENT_USER\Control Panel\Desktop - Find
MenuShowDelay, change the value from400to0 - Restart
Safe, small registry edit — but “safe” still means “back up first,” every time, no exceptions.
Third-party debloat and tuning scripts (Sophia Script, various PowerShell “optimization” scripts, community debloat tools) — these show up constantly in forum threads because they genuinely can strip out a lot of Windows overhead fast. They also run with the assumption you understand exactly what each option removes, and a mistimed run before a Windows update can break things that are painful to unwind. If you go this route: read exactly what each toggle does before running it, and back up first. This isn’t a beginner-guide recommendation — it’s a “if you already know what you’re doing” mention, not a step-by-step endorsement.
What NOT to Do
Said plainly, because most competing guides either dodge this or actively push a paid tool as the fix: skip registry cleaners and one-click “PC optimizer” software entirely. Windows 11’s registry and startup management work differently enough from older Windows versions that these tools frequently do nothing measurable, and occasionally break something that was working fine. Every fix in this guide uses only built-in Windows tools or official manufacturer drivers for that reason.
Also skip “driver updater” tools that promise to fix hundreds of issues at once. Get GPU drivers from Nvidia/AMD/Intel directly, chipset drivers from your motherboard or laptop maker, and let Windows Update handle the rest.
FAQ
How do I fix Windows 11 slowness?
Start with the highest-impact, lowest-risk fixes: disable unnecessary startup apps, free up drive space with Storage Sense, update your GPU driver directly from the manufacturer, and switch your power mode to Best Performance. Together these resolve the majority of everyday slowdowns without spending anything.
Why is Windows 11 so slow now, when it wasn’t before?
Usually one of three things: a recent update re-enabled startup apps you’d disabled, a graphics driver got swapped for a generic fallback version during an update, or your drive has filled up enough to slow caching and updates. Check Task Manager’s Performance tab to see whether disk, CPU, or memory is actually the bottleneck before assuming the worst.
Why does my Windows 11 PC take so long to boot up?
Almost always startup app buildup. Open Task Manager’s Startup apps tab, sort by Startup impact, and disable anything marked High that you don’t need the instant you log in. Re-check this after every major Windows update, since it tends to reset.
How do I clean up my PC to run faster?
Turn on Storage Sense (Settings → System → Storage) for automatic weekly cleanup, run Disk Cleanup with “Clean up system files” for a deeper one-time pass, and uninstall large apps you no longer use. Keeping at least 15-20% of your drive free noticeably helps overall responsiveness.
How can I speed up Windows 11 and reduce boot time specifically?
Trim startup apps first — it’s the single biggest lever for boot time. Beyond that, confirm Fast Startup is enabled (Settings → System → Power & battery) and make sure no pending Windows updates are still finishing installation in the background, since that can quietly extend boot time until they complete.
How do I optimize Windows 11 for gaming specifically?
Turn Game Mode on only while you’re actually playing, enable Hardware-Accelerated GPU Scheduling, keep your GPU driver current directly from Nvidia/AMD/Intel, and force your dedicated GPU (not integrated graphics) for the game if you’re on a laptop. VBS/Memory Integrity can be adjusted for a further gain, but that’s a real security trade-off worth understanding before you touch it.
Does deleting temporary files actually speed up a computer?
Yes, genuinely — it’s not just folklore. A fuller drive gives Windows less room for virtual memory paging and file caching, both of which slow down as free space shrinks. The effect is more noticeable the closer your drive gets to full.
Will more RAM actually make a difference in 2026?
Yes, and it’s usually the single biggest jump available short of a full new PC. 8GB is a genuine ceiling for normal multitasking on Windows 11 today; 16GB is the realistic comfortable baseline for most users now.
Is it safe to disable startup apps and background permissions?
Yes. Disabling a startup entry or background permission doesn’t uninstall anything — the app still works normally when you open it yourself. The only things worth leaving alone are your antivirus and any hardware utility you actively rely on (keyboard software, fan control, and similar).
Final Verdict
The real answer to how to speed up Windows 11 in 2026 isn’t one magic setting — it’s a short, ordered checklist. If you do nothing else: update your GPU driver manually from the source, trim your startup apps, and switch to Best Performance power mode. Those three, together, fix the majority of real-world “slow Windows 11” cases without spending a dollar. If performance is still poor after working through this guide, that’s your honest signal it’s a hardware ceiling — 16GB of RAM or a move off a mechanical hard drive will do more than any remaining setting ever could.
Related: best Chrome extensions for productivity, compress PDF files, AI tools for productivity