
How to Compress a PDF Without Losing Quality

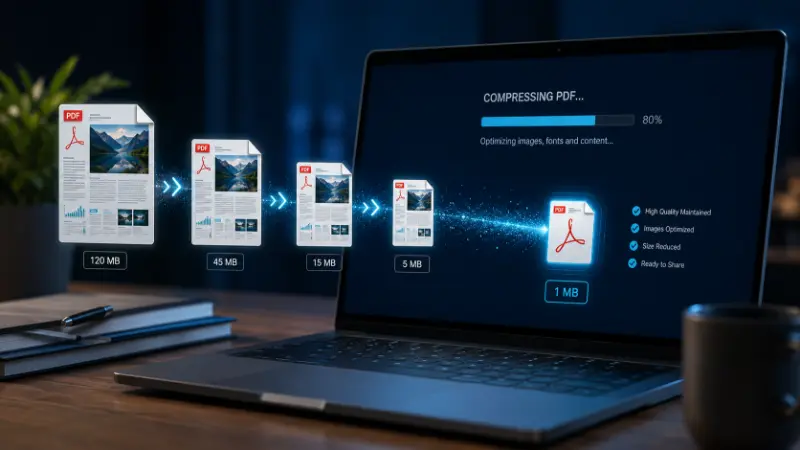
How to compress a PDF without losing quality comes down to one thing: knowing that most of a PDF’s size comes from its images, not its text — so you can shrink the file dramatically without touching the part that actually needs to stay sharp.
You’ve got a PDF that’s too big. Maybe Gmail is refusing to send it, maybe a job portal is rejecting your resume for being over 2MB, maybe your phone storage is full of scanned receipts. Whatever got you here, the fear is the same: you compress it, and now the photos are mush and the text looks like it was faxed twice.
Here’s the short version: a PDF can be made significantly smaller with zero visible quality loss, because most of its size comes from images, not text. Text in a real digital PDF is stored as vector data — shapes drawn from math, not pixels — so it stays sharp no matter how much you compress the file around it. The quality loss people are actually complaining about almost always comes from the images inside the PDF being pushed too hard, or from a scanned document where the “text” is secretly just a photo of text.
Once you understand that distinction, compressing a PDF stops being a guessing game. Below is everything you need — the mechanics, the exact settings, the tool-specific steps people keep asking about, and the mistakes that wreck files.
Why does compressing a PDF make it blurry?
A PDF is a container, not one single file type. Inside it you’ll typically find:
- Text, stored as vector outlines (mathematical shapes) — this compresses without any visual change, ever.
- Fonts, embedded as separate font files — compressing these affects file size only, never appearance.
- Images, stored as raster data (grids of pixels) — this is the only part where compression is actually visible.
- Scanned pages, where the entire page is one image — meaning there’s no separate “safe” text layer to protect.
So when someone asks “does reducing a PDF size ruin the quality?” — the honest answer is: it can, but only the image-based parts, and only if you push it too far. A quick way to check which kind of PDF you’re dealing with: try to click and drag across a line of text. If it highlights like normal text, you have a real text layer and compression will barely touch it. If nothing selects — the whole page acts like one solid image — you’re looking at a scan, and that changes your strategy (more on that below).
What’s actually making your PDF so big?
Before you compress anything, it helps to know what’s bloating the file in the first place:
- High-resolution images — the single biggest cause, by far. A full-page photo saved at 300 DPI can add 5–15 MB on its own.
- Scanned pages at unnecessarily high resolution — most scanning apps and office scanners default to 300 DPI or higher even when the document will only ever be viewed on a screen.
- Embedded fonts — each font family can add anywhere from 100 KB to 500 KB; a document using several fonts can carry a surprising amount of font data.
- Leftover metadata, thumbnails, and edit history — comments, bookmarks, revision data, and hidden layers all travel along with the file.
- Duplicate resources — poorly generated PDFs sometimes embed the same image or font more than once.
The core rule: match resolution to how the file will be used
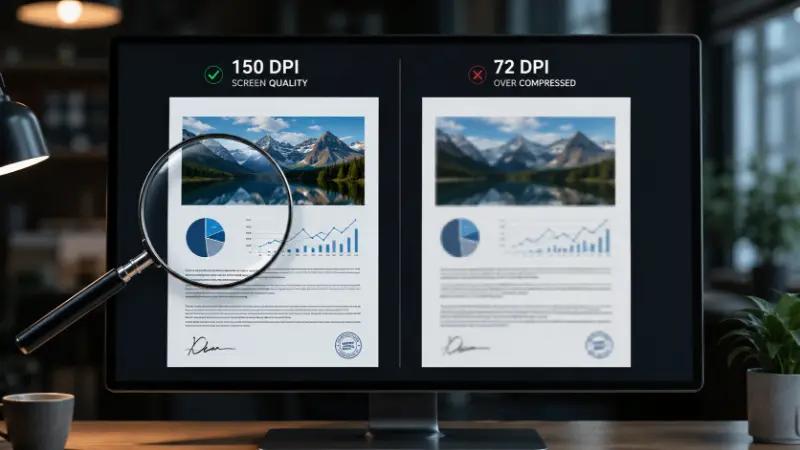
This is the one decision that determines whether your compressed PDF looks the same or looks ruined.
| Intended use | Recommended resolution | Notes |
|---|---|---|
| Screen only — email, upload, sharing | 150 DPI | Sharp on any monitor or phone; the sweet spot for most everyday use |
| Standard printing | 300 DPI | Use this for anything that will be physically printed |
| Archival / storage only | 96–100 DPI | Noticeably softer but fine when nobody needs to zoom in |
| Print-ready design work, fine detail, signatures | 300+ DPI, minimal compression | Do not compress aggressively here |
Most online compressors label their settings Low, Recommended (or Medium), and Extreme/Maximum instead of showing you raw DPI numbers. As a rule of thumb: Recommended/Medium maps roughly to that 150 DPI screen-quality sweet spot, and is the right default for almost everyone. Extreme pushes resolution down toward 72–96 DPI — fine for archiving, risky for anything you’ll zoom into.
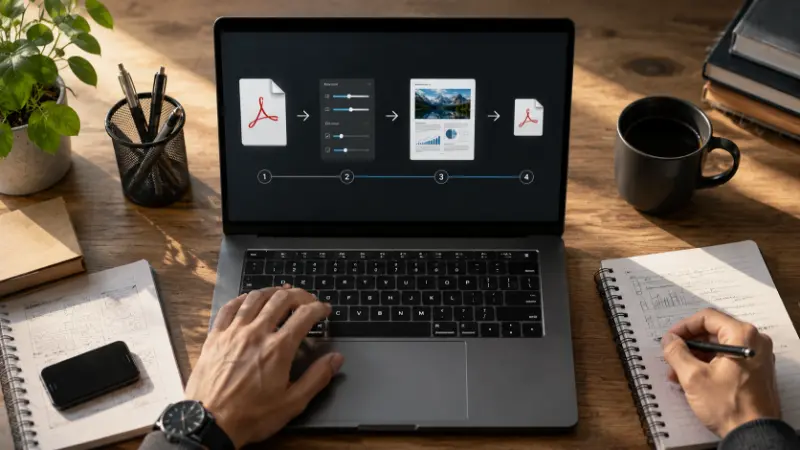
Step-by-step: compress a PDF without losing quality
- Start from the original, uncompressed file. If you’ve already compressed the PDF once and it’s still too big, don’t compress the compressed version again — every additional pass throws away more data permanently. Go back to the source (the original scan, the Word file, the design file) if you can.
- Identify whether it’s a digital PDF or a scan using the text-select test above. This changes what you can safely do.
- Pick the Recommended/Medium setting first, not the most aggressive one. You can always compress further if the result is still too large — you can’t undo over-compression.
- Compress images, not the whole page. If a tool gives you the option, make sure it’s optimizing the embedded images rather than converting every page into a flattened picture — the latter destroys the text layer, makes the file unsearchable, and often looks worse.
- Zoom in and check the result before sending it — specifically on any photo, chart, diagram, or signature that matters. A file that’s 90% smaller is worthless if the one image someone actually needs is now unreadable.
- Keep the uncompressed original. Don’t overwrite your master file — compress a copy so you always have something to fall back to.
How to compress a PDF without any extra software (offline methods)
You don’t need to install anything or upload your file anywhere to shrink a PDF.
On Mac (built-in, no app needed): Open the PDF in Preview → File → Export → in the Quartz Filter dropdown, choose Reduce File Size → Save. This is genuinely one of the most recommended offline methods, and for good reason — it’s fast and completely free. The catch: it only offers one fixed compression level, and it’s fairly aggressive (roughly 72 DPI), which looks fine on screen but soft if printed. There’s no preview and no way to dial it back.
On Windows (via Word or a PDF printer): If the PDF came from a Word document, re-export it with images already compressed inside Word first (File → Compress Pictures) before saving as PDF — you get a smaller file from the source instead of compressing after the fact. Alternatively, “printing” the file to a PDF printer driver at a lower quality setting works, though results vary by driver.
In Adobe Acrobat (desktop, paid): File → Save As Other → Reduced Size PDF for a quick one-click pass, or File → Save As Other → Optimized PDF for full manual control — separate DPI settings for color, grayscale, and monochrome images, plus the ability to strip fonts, metadata, and hidden data individually. This is the most precise option that exists, and it’s the standard professionals reach for when “good enough” compression isn’t good enough.
Compressing to a specific target size (1MB, 200KB, and similar limits)
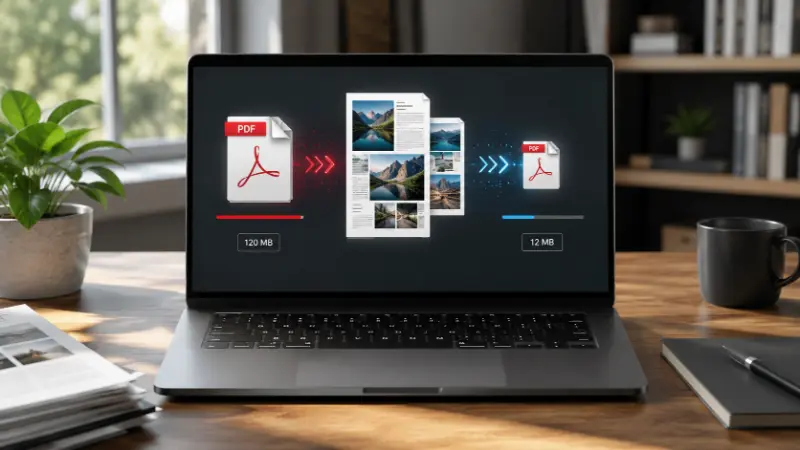
A huge number of people aren’t just trying to “make it smaller” — they need to hit an exact number, because a government portal, exam board, or job application enforces a hard cap. If that’s you:
- Start at Recommended/Medium and check the result. Text-heavy documents often drop dramatically in size with no visible change, since text costs almost nothing to store.
- If you’re still over the limit, drop to a lower DPI target incrementally (150 → 120 → 96) rather than jumping straight to the most extreme setting — this preserves as much visible quality as possible while you find the smallest size that still clears the limit.
- For image-heavy or scanned files, getting under something like 200KB or 1MB usually means accepting some visible softening on photos — there’s a floor below which a page full of images simply cannot go without looking compressed. Text-only pages can go much lower with no visible cost at all.
- If a tool lets you set an exact target size directly, that saves you the guess-and-check cycle — but always open the result and check it before submitting, since automated target-size compression sometimes leans harder on images than you’d choose manually.
Common problems, explained
“Is it bad to compress a PDF?” No — compression itself isn’t damaging by design. What causes visible damage is compressing too aggressively for the content, or compressing a file that’s already been compressed multiple times. A PDF compressed once at a sensible setting is not “worse” in any meaningful way — it’s just smaller.
“Is it better to zip a PDF or reduce/compress it?” These solve different problems. Zipping a PDF (putting it in a .zip archive) barely reduces its size, because PDFs are already a compressed format internally — zip has very little extra to squeeze out. Actually compressing the PDF (reducing image resolution and re-encoding) is what meaningfully shrinks it. Zip a PDF only if you need to bundle multiple files together, not to make one file smaller.
“My scanned PDF still looks bad after compressing.” This is expected, and it’s not a tool failing you — a scanned page is one large image with no protected text layer underneath it, so there’s no “safe” part of the page to leave untouched. Two things help: scan at a lower resolution in the first place (150–200 DPI instead of 300–600 DPI) if the document is only ever going to be read on screen, or run OCR (text recognition) on the scan before compressing. OCR converts the pixelated text into an actual, separate text layer — once that exists, the background image can be compressed much harder without losing readability, because the words themselves are no longer part of the image being squeezed.
“I compressed it and now something (a form, a signature, a link) doesn’t work.” Compression rewrites the internal structure of the file, and that can interfere with things layered on top of it. If a PDF has already been digitally signed, compressing it afterward will typically invalidate that signature, because the signature is a cryptographic check against the file’s exact byte structure — any rewrite breaks it. The fix is sequencing: compress first, then sign, never the other way around. The same caution applies to forms and interactive fields — compress before you fill them in or finalize them, and check afterward that fields, links, and bookmarks still function.
“Can I batch-compress a lot of PDFs at once?” Yes, and most decent tools support it, but be careful about applying one blanket setting to a folder full of mixed content. A batch of ten PDFs that are mostly scanned photos needs a different setting than a batch that’s mostly text reports — if you run everything through the same aggressive preset, the text-only ones probably didn’t need to lose anything, and the photo-heavy ones might come out worse than if you’d handled them separately.
“Does client-side / browser-based compression actually protect my privacy, or is that marketing?” It’s a real distinction, not just marketing language. Server-based tools upload your file to be processed remotely, which means the file — even briefly — sits on someone else’s infrastructure before being deleted. Browser-based (client-side) tools process the file locally on your device using the browser’s own capabilities, so the file never leaves your computer. For ordinary documents this distinction rarely matters. For contracts, medical records, tax documents, or anything with personal information, it’s worth choosing a tool that’s explicit about not uploading your file.
Compression and accessibility — the part almost nobody mentions
If your PDF has accessibility tags (used by screen readers) or is meant to comply with accessibility standards, be aware that aggressive optimization can sometimes strip or damage that tagging structure along with the metadata it removes. If the document is going to be published publicly or needs to remain accessible, use a lighter compression setting and specifically re-check the document’s structure and reading order afterward, rather than assuming “smaller is always fine.”
When you should not compress aggressively at all
Some documents simply aren’t worth the risk of any visible degradation:
- Legal evidence or anything that may be scrutinized later
- Signed contracts (sign after compressing, never before)
- Medical records
- Print production files, especially anything with fine typography or color-critical images
- Accessibility-critical public documents
- Anything you genuinely can’t re-obtain if the result turns out unusable
In these cases, use the lightest available setting — or a “lossless” mode if the tool offers one, which strips redundant data and metadata without touching image resolution at all — and always keep the uncompressed original as your master copy.
Frequently asked questions
Does compressing a PDF reduce text quality?
No, not in a digitally created PDF. Text is vector data and renders identically at any compression level, because compression targets images and file structure, not the text itself. Text only looks worse after compression when the PDF was a scan to begin with — meaning the “text” was actually part of an image the whole time.
How can I compress a PDF to 1MB without losing quality?
Start with the Recommended/Medium setting and check the result — many documents, especially text-heavy ones, will land under 1MB with no visible change. If it’s still too large, reduce the target DPI in stages (150 → 120 → 96) rather than jumping straight to maximum compression, so you lose as little visible quality as possible along the way.
What’s the best DPI for compressing a PDF without losing quality?
150 DPI is the standard for anything read on a screen — email, uploads, general sharing — and looks sharp on modern displays. Use 300 DPI if the document will be printed. Going below roughly 96 DPI is where quality loss becomes noticeable to the naked eye.
Is it bad to compress a PDF?
No. Compression is a normal part of preparing a file to send or store — the risk isn’t compression itself, it’s compressing too aggressively for the content, or compressing an already-compressed file repeatedly.
How do I reduce a PDF’s size without an application, using just my computer?
On a Mac, use Preview’s built-in Export → Quartz Filter → Reduce File Size option — no extra software required. On Windows, compressing images inside the source document (Word, for example) before saving as PDF achieves the same goal without installing anything new.
Why is my scanned PDF still huge after compressing?
Scanned pages are stored as full images with no separate text layer, so compression has to work on the entire page at once rather than protecting the text. Scanning at a lower resolution to begin with, or running OCR before compressing, gives noticeably better results than compressing a high-resolution scan after the fact.
Will compressing a PDF break a signature or form fields?
It can. Compression rewrites the file’s internal structure, which frequently invalidates a digital signature applied before compression, since the signature checks the file’s exact byte content. Always compress before signing or finalizing forms, not after.
Is it better to zip a PDF or compress it to make it smaller?
Compress it. PDFs are already an internally compressed format, so wrapping one in a .zip archive saves very little extra space. Actual PDF compression — reducing image resolution and re-encoding — is what produces a meaningfully smaller file.
Related: best Chrome extensions, speed up Windows 11, AI tools for productivity